Hey world!
So today I'm going to do something which I haven't planned on doing. I'm going to make another "How to draw a City Landscape" drawing lesson, this time from Tel-Aviv (one of Israel's coolest cities).
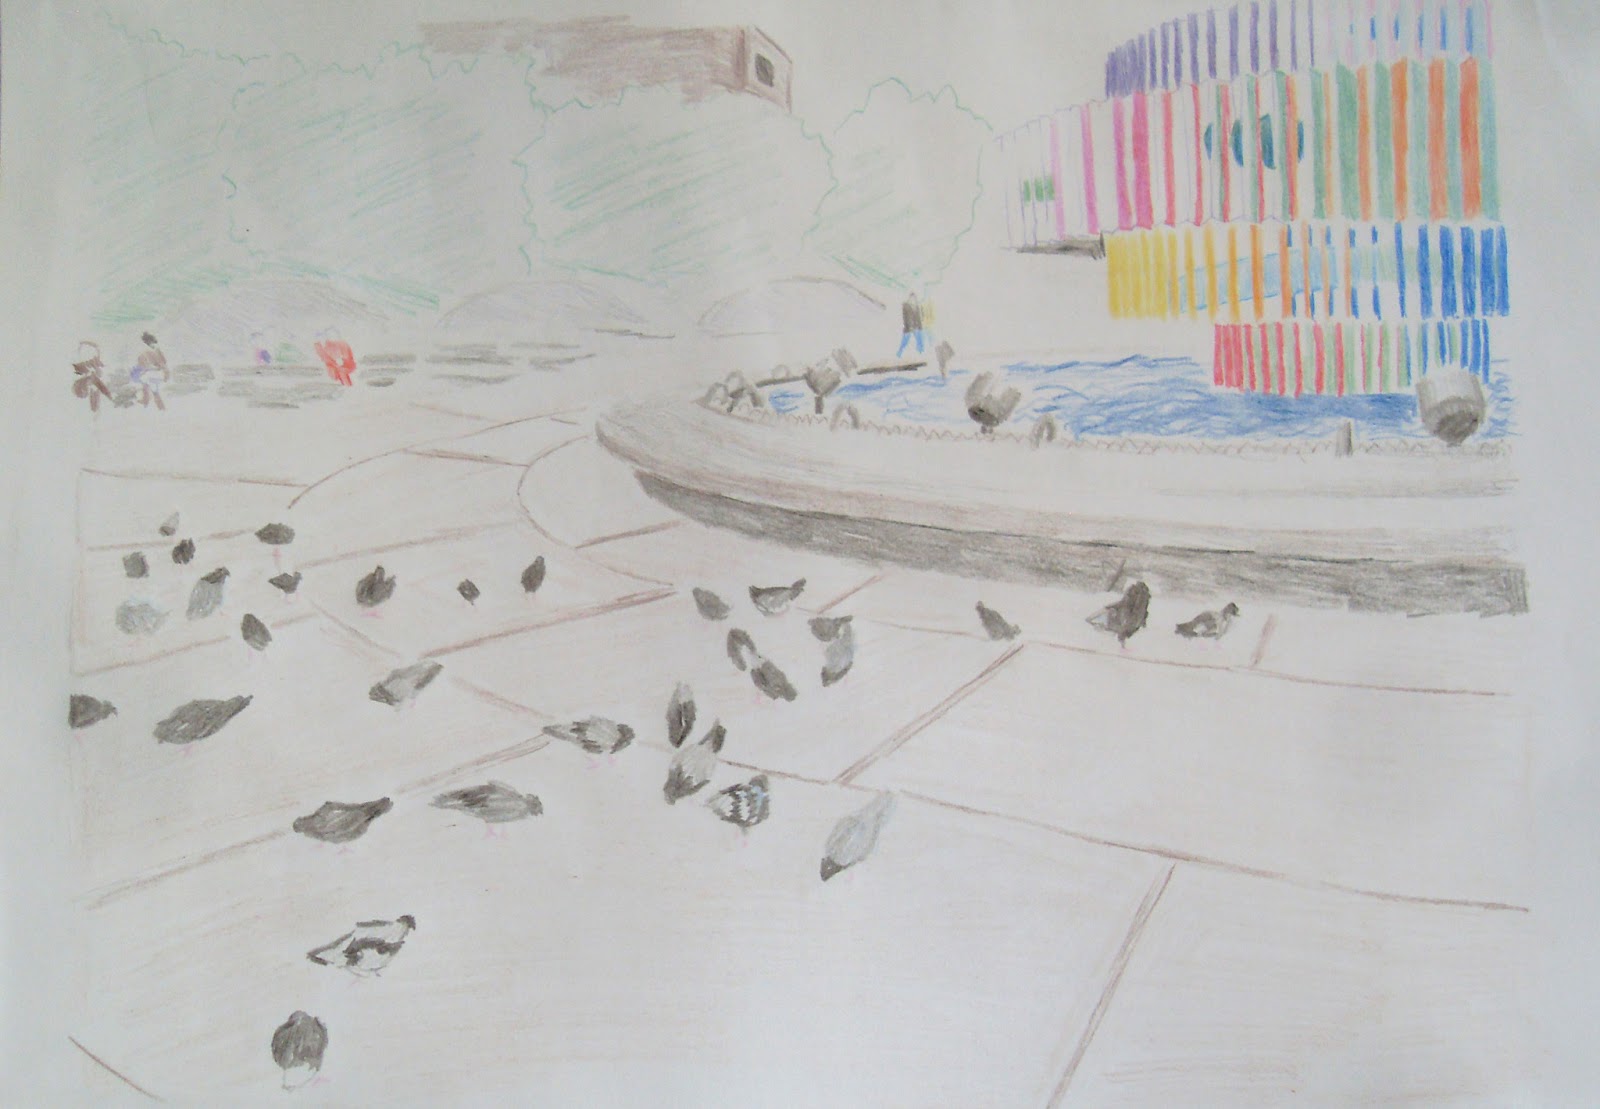
Basically, I was in Tel-Aviv with a good friend of mine, and we went to Dizengoff Square and started taking pictures. Then I thought to myself, wouldn't it be cool to share this great view with everyone?
Today we are going to draw this:
So lets get started!
First things first - I made a very light, non detailed sketch of where basically everything is going to be. And yes, these are the pigeons.
Now I go over the sketch and darken things up. Here is a small tip: while you are drawing, darkening or inking, put a small piece of paper under your drawing hand, like I did. That way you won't smear your work and possibly ruin it.
After going over all the lines and making them clearer, here is a scanned version of the drawing. The lines are very light, since my scanner sometimes doesn't do well with pencil [=
Now I'm going to do what I did in the previous lesson, and tape the drawing, along with a new clean paper on top of it, to the window (like a light table). Now I can do the coloring on a new paper, and easily get rid of the pencil work.
After I finish coloring, this is what I got:
Now its time to start inking. Here I go at it, inking AS SPARINGLY as I can. Like I taught you in the previews lesson, because I used colors first, I can now sort of "sit back" with the ink, and let the colors do most of the work.
A word on mistakes:
On that last image you can see I've made a couple of mistakes with the inking. It's important for me to make it clear - this is TOTALLY OK. When drawing, you have to accept the fact that some mistakes are inevitable. Some of the mistakes can be corrected, while others can be completely prevented if you work correctly (for example - putting that piece of paper under your hand).
In this example, I accidentally had too much ink "bleed" out of my nib pen. I try to smooth it out as much as possible, and I can probably leave it at that. Sometimes, more "drastic" measure may need to be taken, such as using Tipp-Ex. This time its unnecessary. And keep in mind that no mistake means the end of the world [=
So there you have it - the finished drawing:
I hope you enjoyed this drawing lesson. This is it for "How to draw a City Landscape", for the time being....
On another note, I plan to make the next drawing lesson really really educational, and to try
and take you step by step, through the drawing process, while talking about some techniques. It is going to
be on a highly demanded subject, so get ready!
Here is a sneak peak.... (;
Peace,
- Liron
Read More
Hello people of the world!
Today I have a special treat. In this drawing lesson, you will learn how I drew... this:
This scenery is from Prague's Old Town Square (Staromestske namesti). I was traveling there a couple of months ago, and it always amazes me how inspiration comes in big waves when I see new views and cities.
I think this is a really special post, because let me tell you this, I believe this is one of the most professionally finished drawings I've ever made, and I did many things differently then most of my other colored drawings.
So lets start by looking at the first sketch of this (I know you can barely see, don't worry, next ones are darker).
This entire drawing is based on a picture I took when I was there. This is really a simple sketch, to set up the perspective, the location of the important figures and buildings, and all the rest of the basic stuff.
Here I started giving the lines more strength, and adding more details:
In this specific drawing, I don't go in order from left to right, or anything like that. I decided I'll go by order of importance. So I first go over the woman and child, then the band and the equipment, then the crowd and people behind, and then the buildings.
Here is the scanned version of the finished sketch:
In here you can see I finished most of the details, and notice how I was really "light" on the buildings and background. This is really important when drawing scenery like this one, because if I went into too many details it would completely shift the focus from the band and crowd, and we don't want that to happen now don't we? [=
The next step is where I want to stop and explain what I did in more detail.
When making a drawing with the purpose of coloring it, there are many ways to go about doing it. What I almost always do, is simply finish the pencil version, go over it with ink (usually a nib pen) and then finally coloring it.
This time however, I decided to... First color it, and THEN ink it.
That method has a few HUGE advantages, since it allows you to give depth using the colors first, and only then go over it with ink, only on the places necessary. That way, instead of "coloring closed areas" on the drawing, you color it to make it POP, and then ink as little as possible to keep it dynamic.
And this is how I did it:
If you have a light table you can use one. I don't, so as you can see, I taped the sketch and another blank paper to my window. That way I can see through, and color the drawing on a fresh paper, without all of the pencil lines I've done in the sketch! Some people just color the same page, but I wanted it to be as clean as possible.
here is a close up of the coloring process.
Eventually, this is what I got, nice eh? No lines, only colors.
Now It's time to ink it up! Here is the beginning of this step:
As you can see on the left, I'm using my trustworthy nib pen. And as I said before, I ink ONLY whats necessary.
Here's some more:
I can see so many lines that I would have inked for sure, and would be so useless since I can indicate them, like here, using colors.
And now... here is the final result again!
Again, in my opinion this is one of the best finished drawings I've ever made, and I had tons of fun making it (=
Hope you enjoyed this drawing lesson as much as I did, and also learned a thing or two.
Until next time,
- Liron
Read More
Hey world!
So, since this is an "Art in the Middle East" blog, I decided to have a drawing lesson on the animal which is infamously related to the middle east - the CAMEL [=
I will start by giving the basic structure, and then we will add the body itself, and all of the details.
Lets get right on it!
1. The basic structure
Here it is, nothing too fancy!
Basically, the camel figure is composed of a very large central mass, a curvy neck, and four, relatively long (!) legs.
Here are the main points to get correctly:
A. The main mass is shaped as a fat oval. The hump comes on top of the center of that oval.
B. The legs are very long. After a bit of research I came to the conclusion that the height of each leg is about the horizontal length of the main mass oval:
C. The neck comes out of the front, central part of the body, and the head is in about the same height level of the hump.
D. The knees are very prominent. Also, the 2 front leg's joints are bending like a human's knee (to the front), and the other 2 leg's joints bend to the back.
2. The simple figure
Here I added the basic figure, without too many details. Notice the unique shape of the legs and how they bend, and also the feet.
Now I want to try and do something a bit different, and have a close up look on the important parts of the body.
3. The head
Let me tell you, this is one funny looking animal =P ... Notice how the eyes are really far away to the sides, especially with the heavy foreshortening that occurs here, when it is looking straight at us. The central part (with the nostrils and mouth) is actually closer to us then the eyes and ears, which are more at the back. I gave it a little fuzziness and fur in the part where the head connects to the neck, as I've seen it in many photos (and in the few real life camels I had the chance of seeing).
4. The central mass
The central mass is pretty huge. Look at the big belly in the bottom. Also, look how the hump is less noticeable then the way it is usually drawn in cartoons or kids drawings (although the prominence of it CAN vary a lot).
5. The feet
These are really uniquely shaped, there are two toes, and hopefully I got these anatomically right.
6. Finished pencil version
7. Finished inked version!
Here is the complete version! I inked using a nib pen and ink.
Hopefully this drawing lesson was clear and simple, and gave you an idea of one way to draw a camel, and how the camel figure is built and moves.
I know I'm late with this post, been extremely busy lately, big life change
Will do my best to pick up the pace.
Also, check out my new website and subscribe for a FREE eBook! (=
LironYan.com
Until next time, [=
- Liron
Read More
Hey guys, how ya been?
This is not going to be a how to draw lesson. In this post I want to share with you some of the best (and best known) Israeli and Middle Eastern foods, together with Examples I drew especially for you!
These are all great and tasty foods that I recommend you try for yourself, if you want to spice up your culinary experience. Also, if you ever come to Israel, these are a must...
As a side note, I am a vegan, which is great, because most (but not all) of these foods are vegan.
A word or two about the Israeli cuisine:
It is a subject of debate whether there actually is such a thing as Israeli cuisine or not, because of the fact that Israel is such a young country (that officially exists only since 1948).
But even with all the debating going on, it is impossible to say that Israel doesn't have its own way of doing things in the kitchen, and its own inventions that are related to food!
Here are the 5 foods of my selection.
Falafel
The Middle Eastern super food. Tasty, simple and healthy!
It is a fried patty, made mostly out of Chickpeas, Fava beans and Parsley.
The falafel is usually served inside "Pita" bread, with salad, hummus, tahini, fries and pickles.
Jachnun
Jachnun (pronounced Jachnoon) is a pastry which originated in the Yemenite Jewish communities, and is a vastly popular food in Israel.
It is made of slowly, low heat cooked dough, which is rolled. It is mostly served with mashed tomatoes, as well as eggs.
Hummus
A well known Middle Eastern food.
Hummus is made by mixing blended chickpeas, tahini, garlic, squeezed lemon and water. Also, usually paprika, tahini on top, parsley and olive oil are added to the hummus. It is served with pita bread, and is eaten not by spreading it, but rather by breaking pieces of the pita and "wiping" it with it.
This is what I recommend you the most, since its extremely accessible, very healthy and tasty (I could probably live of it for days!). We actually make it quite a lot on our own in my family.
Bourekas
Bourekas (also known as Börek) is a pastry made of thin "leafy" dough, called phyllo. It is typically filled with white salty hard cheese, or with mashed potatoes, but can sometimes be filled with pizza sauce, mushrooms or meat.
It's origins are probably in Turkey, while it was under the Ottoman empire's control. This might also explain how it became popular in Greece and Cyprus.
In the drawing, the triangle shaped bourekas is filled with cheese, and the square one with potatoes. Looks yummy, doesn't it??
Last but not least - BAMBA
One of the most recognized and popular snacks in Israel!
The Bamba started being mass produced in 1964 by "Osem" company. It is made of puffed corn, coated with peanut butter. It is really similar to Cheez Doodles, with peanut butter instead of cheese!
It contains a lot of vitamins, minerals and no preservatives, cholesterol or food coloring (pretty healthy for a snack...).
Here is a typical Bamba package, with some bambas besides it.
Thats it for the foods I want to share with you, I had a blast drawing these, since I don't usually draw food.
I will probably make a second part about foods, that relates to holidays, in the future [=
Anyway, thats all for this time, hope you enjoyed and learned new things.
Till next time,
- Liron
Read More
Hey world,
Today's drawing lesson will be dealing with a very touchy and sensitive subject... you will learn how to draw hands!!
So yeah, I'm half kidding half serious. A lot of people struggle drawing the human hand, because it CAN be pretty complicated, but as long as you understand the basic logic of it, you're gonna be fine [=
* Update (July 2013) - I made a newer, more elaborate lesson: How to draw hands - A step by step guide, and some more examples: How to draw hands - Step by step - Examples, that I recommend you to check out now / after you finish this lesson (links will open in a new window).
In this lesson, I will try to explain a bit on how it works, and then give 2 examples on how to apply it, by drawing a tightly clenched fist and an open palm.
I want to make it clear though, there are infinite ways and poses of drawing hands, these are just 2 to get you started, but I suggest you try and draw your own hands and other people's hands in as many position possible, to get this down.
So lets get right on it!
Here are 3 examples of the human hand, in which I put guide lines to help us understand the basic structure.
(click to enlarge)
Notice that the black lines represent the "fatty" areas of the right and left sides of the palm. The red ones are for the place from which the fingers connect to the palm.
A couple of important observations:
1. The area where the thumb connects is a bit fat. This is also true to the other side of the palm (the right one in this example).
2. The 2st and 4rd fingers are usually the same length, the 3nd finger is the longest and the 5th is the shortest (actually about the same length of the thumb).
3. When the hand is closed to a tight, clenched fist, the thumb goes OVER the other fingers, and her "fat" part becomes more prominent.
4. Notice that the fingers are creating a sort of a "fan" shape. we will see more fanning later on.
5. Pay good attention to the red line, and where it is located, especially in the right most example.
Okay, are you ready to draw this for yourself??
Here it is, step by step - first the picture and then the explanation.
HALF OPEN PALM
Step 1:
Okay, so here I outlined the general shape of the palm. I also added the thumb, and the location of the other 4 fingers, without too much details. The best way to get this right, is again, to look at a real hand and sketch it.
Pay attention to the "fatty" left and right parts, which we already indicate lightly here.
Step 2:
Here I added the fingers, including the basic nail location.
Most of this is pretty straight forward, but notice how the 2nd finger is sort of pointed towards us, which creates what is called foreshortening (the nail is "squashed", the top most part of the finger is short).
This foreshortening happens to some degree in each of the 5 fingers, but is most noticeable on the 2nd and 3rd ones.
Step 3:
Here I indicated the wrinkles of the palm skin. There are 2 small wrinkles on each finger (we see only some of them). There are also wrinkles indicating the fatty areas, especially near the thumb. Notice how it actually creates a circle on the left side of the palm. And that hand is finished (=
----
Check out my new website and subscribe for a FREE eBook! (=
LironYan.com
----
CLENCHED PALM
Step 1:
I will explain a bit more at this point.
Can you guess what the lighter line is? That's right, its the RED line from the previous examples! And the top line is actually where the fingers will be. See how they are far apart.
Also, notice that as I said before, the thumb goes ON TOP of the other fingers, folded at about 90 degrees.
Another thing that happens here, due to this, is that the fat bulk that is underneath the thumb becomes more noticeable.
Step 2:
Here is the fun part, I divided the top line from before to 4 fingers. Notice the purple angle lines? That's what I meant before when I said fanning.
I also added the nail to the thumb, the other nails are not visible.
Step 3:
Like in the open palm example, here I indicated the wrinkles of the skin, and done some shading.
Notice something interesting I haven't mentioned before - the vain at the bottom will sometimes come up in these poses, we can indicate it lightly.
That's mostly it for today's drawing lesson, on how to draw the human hand. In the beginning, drawing hands can be a bit frustrating, but once you practice and internalize it, it becomes really fun, and still challenging.
So work hard towards mastery of this.
Also, check out my new website and subscribe for a FREE eBook! (=
LironYan.com
And I will see you on the next post! wonder what it will be about.... hmmm... you'll have to wait and see ( ;
Peace,
- Liron
Read More
Hello people of the world!
This is going to be a shorter post then the few last ones because it's less of a lesson.
In this post I want to show you some finished artwork, and how to apply what we've learned in the last lesson, about how to draw in one point perspective.
So first thing - remember that nice street in Jerusalem, that I mentioned in the end on my last post?
Well, here it is, in its AWESOMENESS!
I'm really happy with how it turned out. Shading those stones on the walls was grueling [=
This may seem complicated, but actually what we've learned on the last lesson is more then enough to create this, since its a simple one point perspective drawing (The stairs do make it a bit more complicated, but still pretty straight forward).
So just to get the point across, here is how the OPP works in this one:
All the lines that are coming towards us, are coming out of the center point.
Anyhow, thats about OPP. Now for the special treat!
This is the scanned Ferrari from 2 posts ago:
And here's the finished, scanned, (digitaly) colored version!!
At the beginning I thought about coloring it using colored pencils / markers, but then I changed my mind and digitally colored it. Which gives me an idea of making a future lesson about how to digitally color with photoshop...
Anyway, let me know if you like how it turned out [=
Thats all for today,
Until next time,
- Liron
Read More
Hey people of the world!
In this drawing lesson, you will recieve a detailed explanation and will learn how to draw in one point perspective, and afterwards we will apply what we have learned and hopefully get some cool results.
Please be sure to download my eBook on drawing in perspective, which will give you a much more detailed explanation than this short lesson.
Get it here:
How to draw in one point perspective - let's get to it!
Questions...
So what is one point perspective? what is perspective? This is not a stupid question at all. In order for any drawing to turn out great, in my opinion, there are two main important things:
1. An understanding of how what we are drawing looks, and why it looks that way.
2. A sense of creativity [=
Perspective is a part of understanding why what we are drawing looks the way it does. So what is perspective? To put it in the simplest words possible, perspective defines how something is going to look from a specific angle.
OPP (one point perspective) is one way of projecting the reality on your canvas. Does this mean that a OPP drawing has to be realistic? Not at all! Reality can be bended at our will, but we will perhaps get to that in a future lesson (=
Key Principles
The main principle for OPP (and perspective and drawing in general) is the fact that objects that are closer to us are relatively bigger, while objects that are far from us, are generally relatively smaller. And this applies to everything. Have you ever looked at a road that looks wider as it gets more near you? Or a railroad that literally disappears to the distance?
Now lets talk business - how to draw it?
The first step for me, is deciding on where the horizon is going to be. A simple rule - the thing thats in line with the horizon is the same height that we are. So if a persons face is blocking the horizon, that means that our height is the same as that persons height. Consider these examples, in which I drew the horizon in red, just for you.
On the left one, we are the height of the ant, and on the right one we are the height of the soaring seagull. But where should you put the horizon in your drawing? That depends on where "YOU" are! (you as in a concept of where the viewer of the drawing is) If you are out on the street and you want to draw it from your angle of height, then the horizon line is going to be... can you guess where? That's right... at the height of a person's head!
Consider these examples for drawings from a persons height, and pay close attention to the fact that the height of the horizon line is different for each one of them, but they are still drawn from the same height!
Another important thing to understand - the horizon doesn't have to be completely horizontal, it can also be a bit diagonal, like in these examples...
There's more to talk about the horizon, but this lesson is becoming of a monster's length so I'll leave it up to you to discover and learn more, and perhaps I will delve more into it in the future.
Vanishing point (VP)
After we set the horizon, it is time to place our point, for the OPP, which is called the "VANISHING POINT". The VP's location depends on where you want your far objects do "disappear". Also, the VP is the point from which all lines are going to "come out" of. Can you find the VP's in these examples? (Hint - connect the meeting point of the lines that are "coming towards us").
So instead of blabbering on and on, let's pick a simple scene and try to draw it. One of the best ways to do this in my opinion, is the railroad example.
----
Also, check out my new website and subscribe for a FREE eBook! (=
LironYan.com
----
A. First - lets define the horizon and the VP. I define both pretty much in the center / lower center.
B. Now it's time to think and ask, what objects do we want to "come towards us"? Lets choose the railroad tracks! ( DUH [= ) Now lets draw them so they are all "coming out of" the VP. Also, all other lines that represent things that get closer to us, must follow this rule. Notice how I shaded the inner parts of the rails, to add them some depth and 3D-ness. The more outside lines are to make sure I get the next step right.
C. Now lets add the details and the other lines that aren't coming towards us, like the horizontal lines. Notice how these lines, at their outer edges, also follow the rules of perspective by ending at the sides in congruence with the lines I drew on the previes step. Also pay attention to their "wooden" texture, and the fact that they get smaller, and more closer to each other the further they "disappear" into the VP. As long as you follow the basic lines from the previews steps, this WILL be a piece of cake for you!
D. As a fun experiment, we can add other objects just to get a feel for the distance. Remember the most important concept - objects that are closer to us are relatively bigger, while objects that are far from us, are generally relatively smaller.
Add as much details as you like, such as trees, signs, even cows/other field animals, (preferably not ON the railroad tracks...).
F. Voila! You have a drawing in ONE POINT PERSPECTIVE!
That's mostly it for the "I teach you" part. Now comes the most important (and fun) part. YOU have to walk outside, and start looking at things and understand why they look the way they do. By doing so, you will start to get a good understanding of the concepts. Then practice a lot on drawing it, and you should be doing just fine.
Drawing complicated stuff is easy and fun once you understand what you are doing, so truly embrace that concept of thinking, learning and observing things on your own.
On the next post, I'm going to show you the finished version of the Ferrari from the previous lesson, as well as a drawing of a special street in Jerusalem, in one point perspective, so fun things to expect.
----
Also, check out my new website and subscribe for a FREE eBook! (=
LironYan.com
----
And as always, let me know if this drawing lesson helped you in learning how to draw in one point perspective, and what you think can be improved.
Will talk to you soon,
Liron
Read More