Hello people of the world!
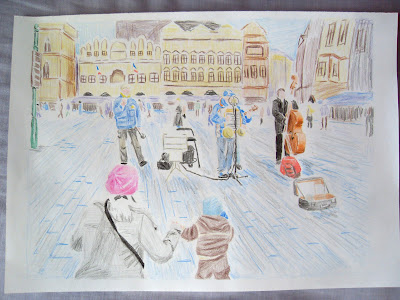
Today I have a special treat. In this drawing lesson, you will learn how I drew... this:
This scenery is from Prague's Old Town Square (Staromestske namesti). I was traveling there a couple of months ago, and it always amazes me how inspiration comes in big waves when I see new views and cities.
I think this is a really special post, because let me tell you this, I believe this is one of the most professionally finished drawings I've ever made, and I did many things differently then most of my other colored drawings.
So lets start by looking at the first sketch of this (I know you can barely see, don't worry, next ones are darker).
This entire drawing is based on a picture I took when I was there. This is really a simple sketch, to set up the perspective, the location of the important figures and buildings, and all the rest of the basic stuff.
Here I started giving the lines more strength, and adding more details:
In this specific drawing, I don't go in order from left to right, or anything like that. I decided I'll go by order of importance. So I first go over the woman and child, then the band and the equipment, then the crowd and people behind, and then the buildings.
Here is the scanned version of the finished sketch:
In here you can see I finished most of the details, and notice how I was really "light" on the buildings and background. This is really important when drawing scenery like this one, because if I went into too many details it would completely shift the focus from the band and crowd, and we don't want that to happen now don't we? [=
The next step is where I want to stop and explain what I did in more detail.
When making a drawing with the purpose of coloring it, there are many ways to go about doing it. What I almost always do, is simply finish the pencil version, go over it with ink (usually a nib pen) and then finally coloring it.
This time however, I decided to... First color it, and THEN ink it.
That method has a few HUGE advantages, since it allows you to give depth using the colors first, and only then go over it with ink, only on the places necessary. That way, instead of "coloring closed areas" on the drawing, you color it to make it POP, and then ink as little as possible to keep it dynamic.
And this is how I did it:
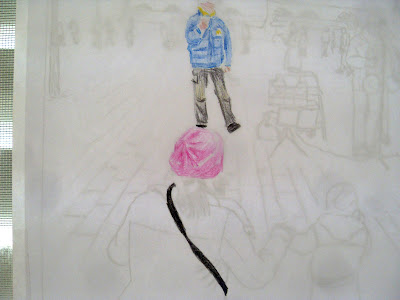
If you have a light table you can use one. I don't, so as you can see, I taped the sketch and another blank paper to my window. That way I can see through, and color the drawing on a fresh paper, without all of the pencil lines I've done in the sketch! Some people just color the same page, but I wanted it to be as clean as possible.
here is a close up of the coloring process.
Eventually, this is what I got, nice eh? No lines, only colors.
Now It's time to ink it up! Here is the beginning of this step:
As you can see on the left, I'm using my trustworthy nib pen. And as I said before, I ink ONLY whats necessary.
Here's some more:
I can see so many lines that I would have inked for sure, and would be so useless since I can indicate them, like here, using colors.
And now... here is the final result again!
Again, in my opinion this is one of the best finished drawings I've ever made, and I had tons of fun making it (=
Hope you enjoyed this drawing lesson as much as I did, and also learned a thing or two.
Until next time,
- Liron


No comments:
Post a Comment