Showing posts with label colored. Show all posts

Saturday, April 13, 2013

Israeli and Jewish Holidays Food!

Hey people,

This post is sort of a "part 2" to the Israeli (and Middle Eastern) Foods! post. This one is going to be about Israeli Jewish foods for holidays. Most of these are regular foods! But eating them bacame a tradition in Israel.

So lets get on with the foods!

Sufganiot (Doughnuts)

draw sufganiot doughnuts


This is the Israeli equivalent of doughnuts. It is eaten during "Hanukkah" holiday (which takes place at about same the time as Christmas).

These are made from a dough which is deep fried in oil. The Sufgania can be filled with different creams, but is most commonly filled with strawberry jam. It is highly delicious, and contains at least 350 calories for each one =P

I find myself eating at least 4 every holiday, I love these!

Passover foods

Passover plate:

draw passover plate


This is the traditional passover plate, which contains (from top, going clockwise): "hazeret" (horseradish), "charoset" (mashed paste, usually made from apples), "zroa" (chicken), "maror" (Lettuce), eggs and "carpas" (usually celery or parsley).

The infamous Matzo

draw matzo


This cardboard like unleavened bread is one of the most well known foods connected to passover. On passover, Jewish and traditional people do not eat "Chametz" (which refers to any leavened food). The reason is the when the Jewish people left Egypt (exodus), their dough wasn't leavened.

It isn't so tasty and I personally refrain from eating it [=

"Bikurim" basket

draw bikurim basket


This is a basket filled with the first harvesting on "Shavuot" (which literally means "weeks") holiday.
It is filled with all sorts of goodies!

Dried fruit

draw dried fruit

 
These are eaten on "Tu Bishvat", which is a holiday to celebrate nature, and the growth of it. On "Tu Bishvat", it is also a tradition to plant trees.

"Oznei Haman"

draw oznei haman ears


"Oznei Haman" (literally means "Haman's ears"), also called "Hamantash", are pocket shaped pastry. It is usually filled with Poppy seeds, and sometimes with prunes, apples or cherries.
These are eaten on "Purim" holiday, and are named after "Haman", which is the villain in the book of Esther, which is read during this holiday. Another funny fact - when reading the book of Esther, every time haman's name comes up, all the children clap their hands and stomp their feet to make noise.


And now, last but not least...

"Lag Ba Omer"

draw potatos marshmallow bonfire


"lag Ba Omer", which means the 33rd day in the "Omer" count, is usually celebrated buy lighting bonfires throughout Israeli. Every Israeli kid has his memories of collecting wood with friends, weeks ahead of the holiday. In this holiday, it is common to eat Potatoes which have been covered in foil and thrown to the bonfire, and burnt marshmallows.

One of my personal favorites! [=

--------------------------------------------------------------------

That's it for today's post. Hope you learned some new things and enjoyed the drawings!

Next post will also be a sort of part 2, you will have to wait and see....

Until next time,

- Liron [=
Read More

Monday, March 25, 2013

How to draw a City Landscape 2 - Tel-Aviv!

Hey world!

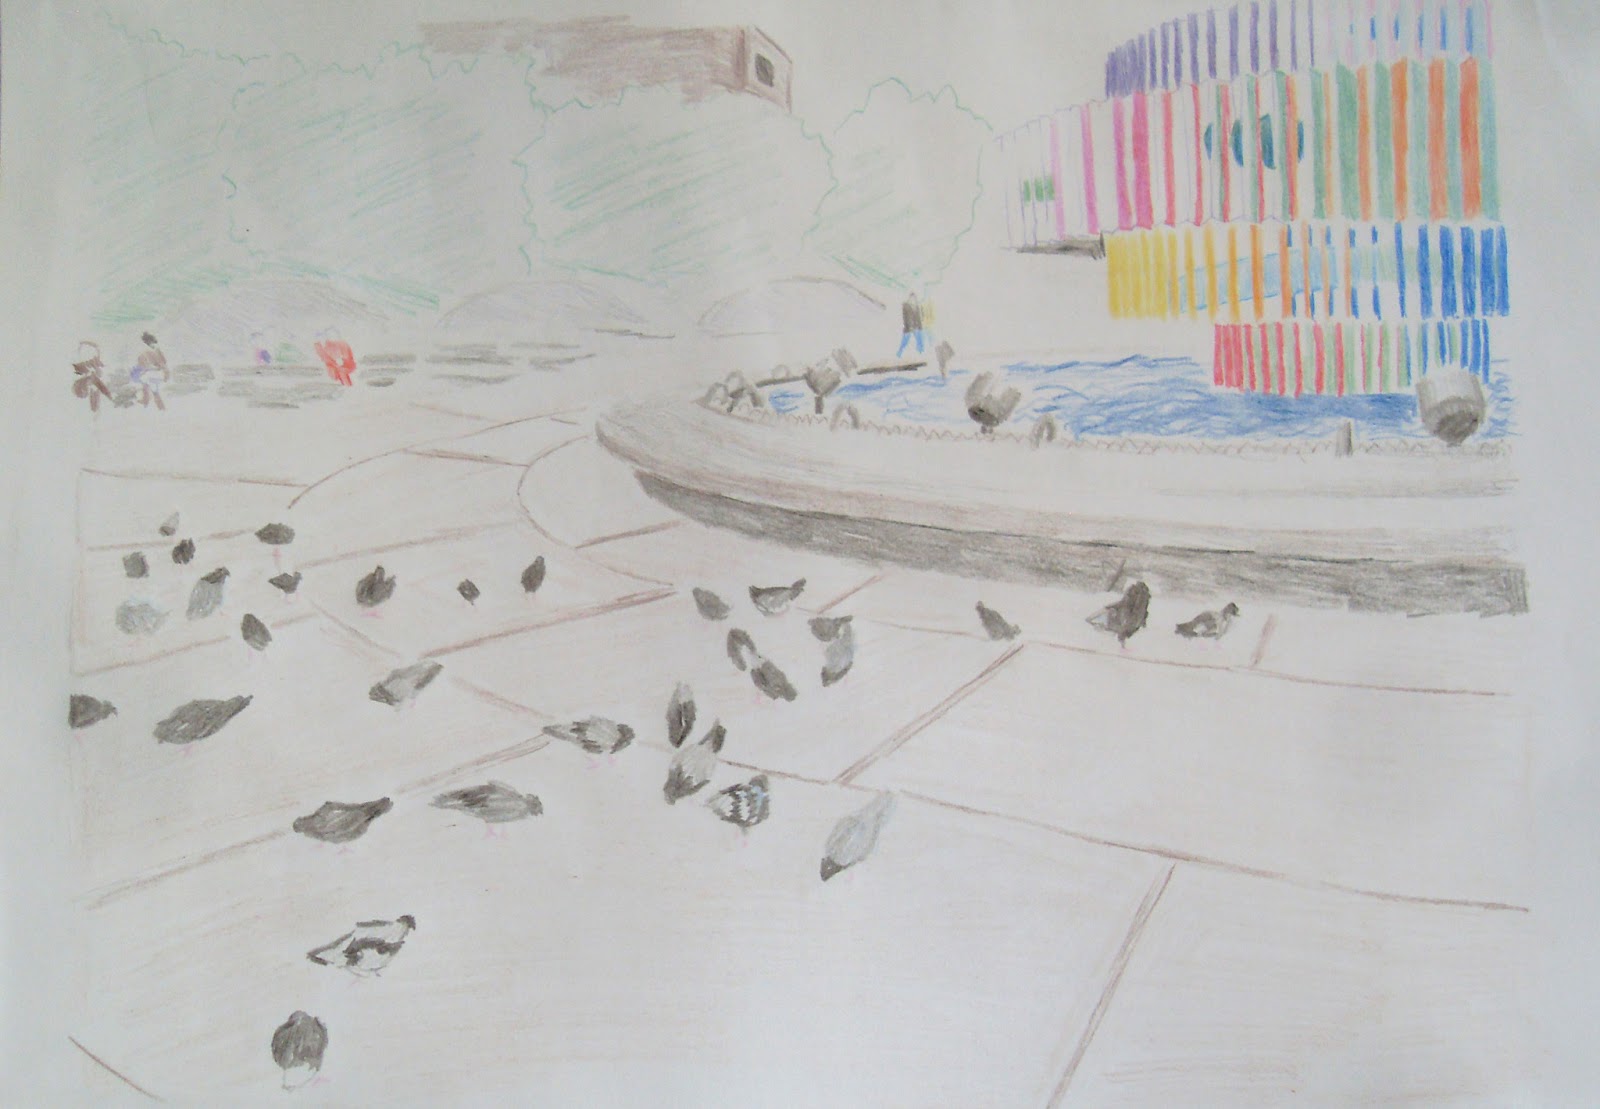
So today I'm going to do something which I haven't planned on doing. I'm going to make another "How to draw a City Landscape" drawing lesson, this time from Tel-Aviv (one of Israel's coolest cities).

Basically, I was in Tel-Aviv with a good friend of mine, and we went to Dizengoff Square and started taking pictures. Then I thought to myself, wouldn't it be cool to share this great view with everyone?

Today we are going to draw this:

draw tel aviv city landscape


So lets get started!

First things first - I made a very light, non detailed sketch of where basically everything is going to be. And yes, these are the pigeons.

draw tel aviv city landscape sketch


Now I go over the sketch and darken things up. Here is a small tip: while you are drawing, darkening or inking, put a small piece of paper under your drawing hand, like I did. That way you won't smear your work and possibly ruin it.

draw tel aviv city landscape pencil linework

draw tel aviv city landscape pencil linework


After going over all the lines and making them clearer, here is a scanned version of the drawing. The lines are very light, since my scanner sometimes doesn't do well with pencil [=

draw tel aviv city landscape pencil


Now I'm going to do what I did in the previous lesson, and tape the drawing, along with a new clean paper on top of it, to the window (like a light table). Now I can do the coloring on a new paper, and easily get rid of the pencil work.

draw tel aviv city landscape color process

draw tel aviv city landscape color process


After I finish coloring, this is what I got:

draw tel aviv city landscape colors


Now its time to start inking. Here I go at it, inking AS SPARINGLY as I can. Like I taught you in the previews lesson, because I used colors first, I can now sort of "sit back" with the ink, and let the colors do most of the work.

draw tel aviv city landscape ink process

draw tel aviv city landscape ink process

draw tel aviv city landscape ink process


A word on mistakes:

On that last image you can see I've made a couple of mistakes with the inking. It's important for me to make it clear - this is TOTALLY OK. When drawing, you have to accept the fact that some mistakes are inevitable. Some of the mistakes can be corrected, while others can be completely prevented if you work correctly (for example - putting that piece of paper under your hand).

In this example, I accidentally had too much ink "bleed" out of my nib pen. I try to smooth it out as much as possible, and I can probably leave it at that. Sometimes, more "drastic" measure may need to be taken, such as using Tipp-Ex. This time its unnecessary. And keep in mind that no mistake means the end of the world [=

So there you have it - the finished drawing:

draw tel aviv city landscape


I hope you enjoyed this drawing lesson. This is it for "How to draw a City Landscape", for the time being....

On another note, I plan to make the next drawing lesson really really educational, and to try and take you step by step, through the drawing process, while talking about some techniques. It is going to be on a highly demanded subject, so get ready!

Here is a sneak peak.... (;

draw dog sneak peek


Peace,

- Liron

Read More

Friday, February 22, 2013

Israeli (and Middle Eastern) Foods!

Hey guys, how ya been?

This is not going to be a how to draw lesson. In this post I want to share with you some of the best (and best known) Israeli and Middle Eastern foods, together with Examples I drew especially for you!

These are all great and tasty foods that I recommend you try for yourself, if you want to spice up your culinary experience. Also, if you ever come to Israel, these are a must...

As a side note, I am a vegan, which is great, because most (but not all) of these foods are vegan.

A word or two about the Israeli cuisine:

It is a subject of debate whether there actually is such a thing as Israeli cuisine or not, because of the fact that Israel is such a young country (that officially exists only since 1948).
But even with all the debating going on, it is impossible to say that Israel doesn't have its own way of doing things in the kitchen, and its own inventions that are related to food!

Here are the 5 foods of my selection.

Falafel

The Middle Eastern super food. Tasty, simple and healthy!
It is a fried patty, made mostly out of Chickpeas, Fava beans and Parsley.
The falafel is usually served inside "Pita" bread, with salad, hummus, tahini, fries and pickles.

draw falafel

Jachnun

Jachnun (pronounced Jachnoon) is a pastry which originated in the Yemenite Jewish communities, and is a vastly popular food in Israel.
It is made of slowly, low heat cooked dough, which is rolled. It is mostly served with mashed tomatoes, as well as eggs.

draw jachnun

Hummus

A well known Middle Eastern food.
Hummus is made by mixing blended chickpeas, tahini, garlic, squeezed lemon and water. Also, usually paprika, tahini on top, parsley and olive oil are added to the hummus. It is served with pita bread, and is eaten not by spreading it, but rather by breaking pieces of the pita and "wiping" it with it.
This is what I recommend you the most, since its extremely accessible, very healthy and tasty (I could probably live of it for days!). We actually make it quite a lot on our own in my family.

draw hummus

Bourekas

Bourekas (also known as Börek) is a pastry made of thin "leafy" dough, called phyllo. It is typically filled with white salty hard cheese, or with mashed potatoes, but can sometimes be filled with pizza sauce, mushrooms or meat.
It's origins are probably in Turkey, while it was under the Ottoman empire's control. This might also explain how it became popular in Greece and Cyprus.
In the drawing, the triangle shaped bourekas is filled with cheese, and the square one with potatoes. Looks yummy, doesn't it??

draw bourekas


Last but not least - BAMBA

One of the most recognized and popular snacks in Israel!
The Bamba started being mass produced in 1964 by "Osem" company. It is made of puffed corn, coated with peanut butter. It is really similar to Cheez Doodles, with peanut butter instead of cheese!
It contains a lot of vitamins, minerals and no preservatives, cholesterol or food coloring (pretty healthy for a snack...).

Here is a typical Bamba package, with some bambas besides it.

draw bamba


Thats it for the foods I want to share with you, I had a blast drawing these, since I don't usually draw food.

I will probably make a second part about foods, that relates to holidays, in the future [=

Anyway, thats all for this time, hope you enjoyed and learned new things.

Till next time,
- Liron


Read More

Saturday, February 9, 2013

How to apply perspective, and finished Ferrari!

Hello people of the world!

This is going to be a shorter post then the few last ones because it's less of a lesson.
In this post I want to show you some finished artwork, and how to apply what we've learned in the last lesson, about how to draw in one point perspective.

So first thing - remember that nice street in Jerusalem, that I mentioned in the end on my last post?

Well, here it is, in its AWESOMENESS!

one point perspective


I'm really happy with how it turned out. Shading those stones on the walls was grueling [=
This may seem complicated, but actually what we've learned on the last lesson is more then enough to create this, since its a simple one point perspective drawing (The stairs do make it a bit more complicated, but still pretty straight forward).

So just to get the point across, here is how the OPP works in this one:


one point perspective guidlines


All the lines that are coming towards us, are coming out of the center point.

Anyhow, thats about OPP. Now for the special treat!

This is the scanned Ferrari from 2 posts ago:

ferrari 355 f1 ink

And here's the finished, scanned, (digitaly) colored version!!

ferrari 355 f1 digitally colored

At the beginning I thought about coloring it using colored pencils / markers, but then I changed my mind and digitally colored it. Which gives me an idea of making a future lesson about how to digitally color with photoshop...

Anyway, let me know if you like how it turned out [=

Thats all for today,
Until next time,

- Liron
Read More