
This is a part 2 lesson for my old drawing lesson on How to draw a hand - Clenched fist and open palm. Today's drawing lesson is going to be a more of a step by step guide for drawing hands. You will learn exactly how to approach this subject. This lesson will include explanations of the human hand's anatomy, what are it's proportions, how to draw it IN ANY POSE and give it depth and solidity.
So without further ado, lets get started!
How to draw hands - Step by step guide
Anatomy of the human hand:
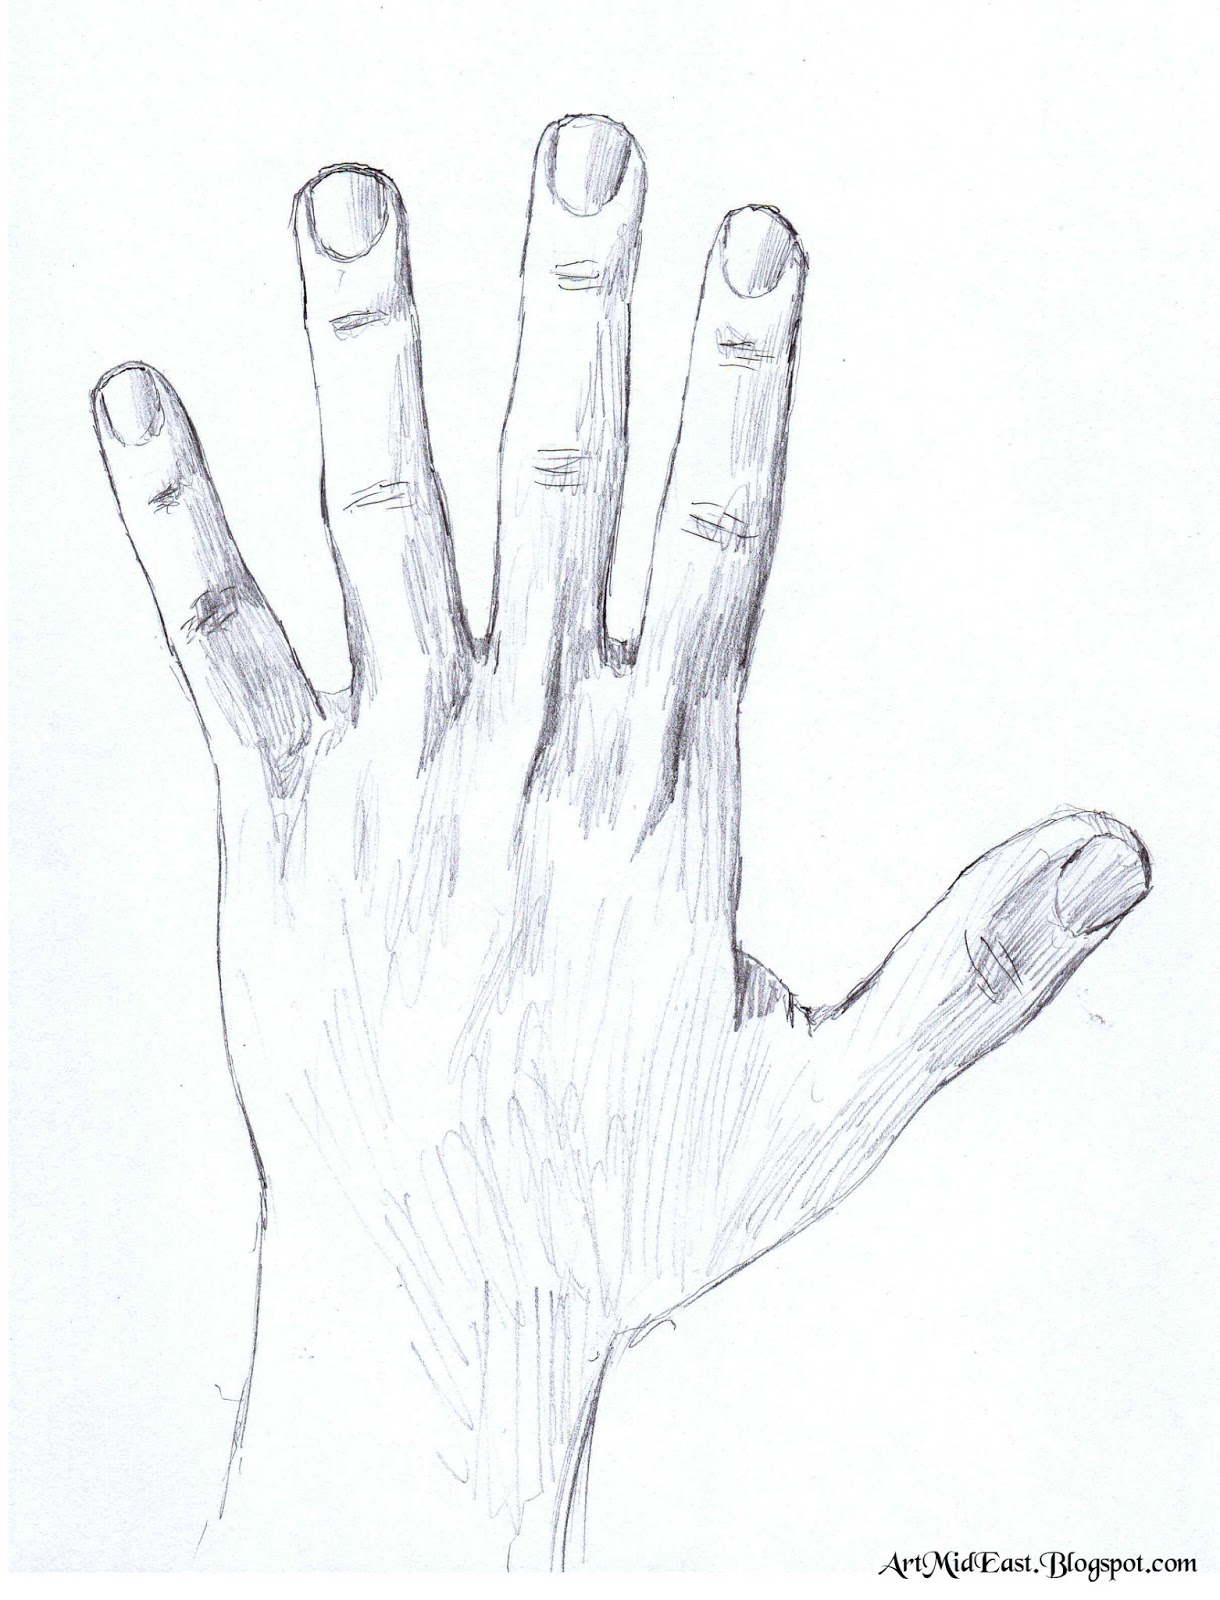
So first, lets learn how the human hand is built. Here is the sketch for the previous drawing.

You can see that that hand is composed of the following parts: part A, part B and the fingers. The overall length of the hand, top to bottom, should be enough to reach from your chin to you hairline. This should give you a good idea on how big the hands should be, which is a major sticking point for many people (including me).
The biggest part of the hand, is the one I marked as part A. Sadly, I can't find a simple "trick", or method of drawing it. I have to actually think while doing so [=. It can help however, to imagine it as sort of a trapezoid. Its inner side (the side closer to B) is longer. After drawing it a couple of times you will kind of get it, and be able to draw it from top, bottom and sideways.
Next is part B. This part connects to the inner side of A (when looking at the hand from top, like both drawings). It also connects to the thumb. Part B is a triangle. Its length (from wrist to beginning of thumb) is about half the length of part A (from wrist to middle finger). After looking at my hands, and many other people's hands, I noticed that its angle is about 40 degrees, but can vary depending on the movement of the thumb.
Now its time for the hardest part - the fingers! Now that's quite a challenge. Check out the fingers on both examples. You can see (as I pointed out on my previous lesson) that the knuckles create a fan. This makes the middle finger the longest, the ring and index fingers almost equal in length, and the thumb and little finger also almost equal in length. Here are a couple of tips for drawing the fingers correctly:
- The Length of the middle finger is about the same as the length of part A.
- The fingers, from longest to shortest: middle, index, ring, thumb and little (together).
- Each finger (except the thumb) is divided into 3 knuckles, with the 3rd (farthest from A) "bended" a tiny bit to the back. For the thumb, the same is true to the second knuckle. Also, the fingers are a bit thicker where the knuckles are.
- The fanning is critical for drawing a correct, realistic looking hand.
- The nails are on top of the 3rd knuckle, and take up about half of it's length.
After we talked about each part individually, lets see how they all connect.
----
Check out my new website and subscribe for a FREE eBook! (=
LironYan.com
----
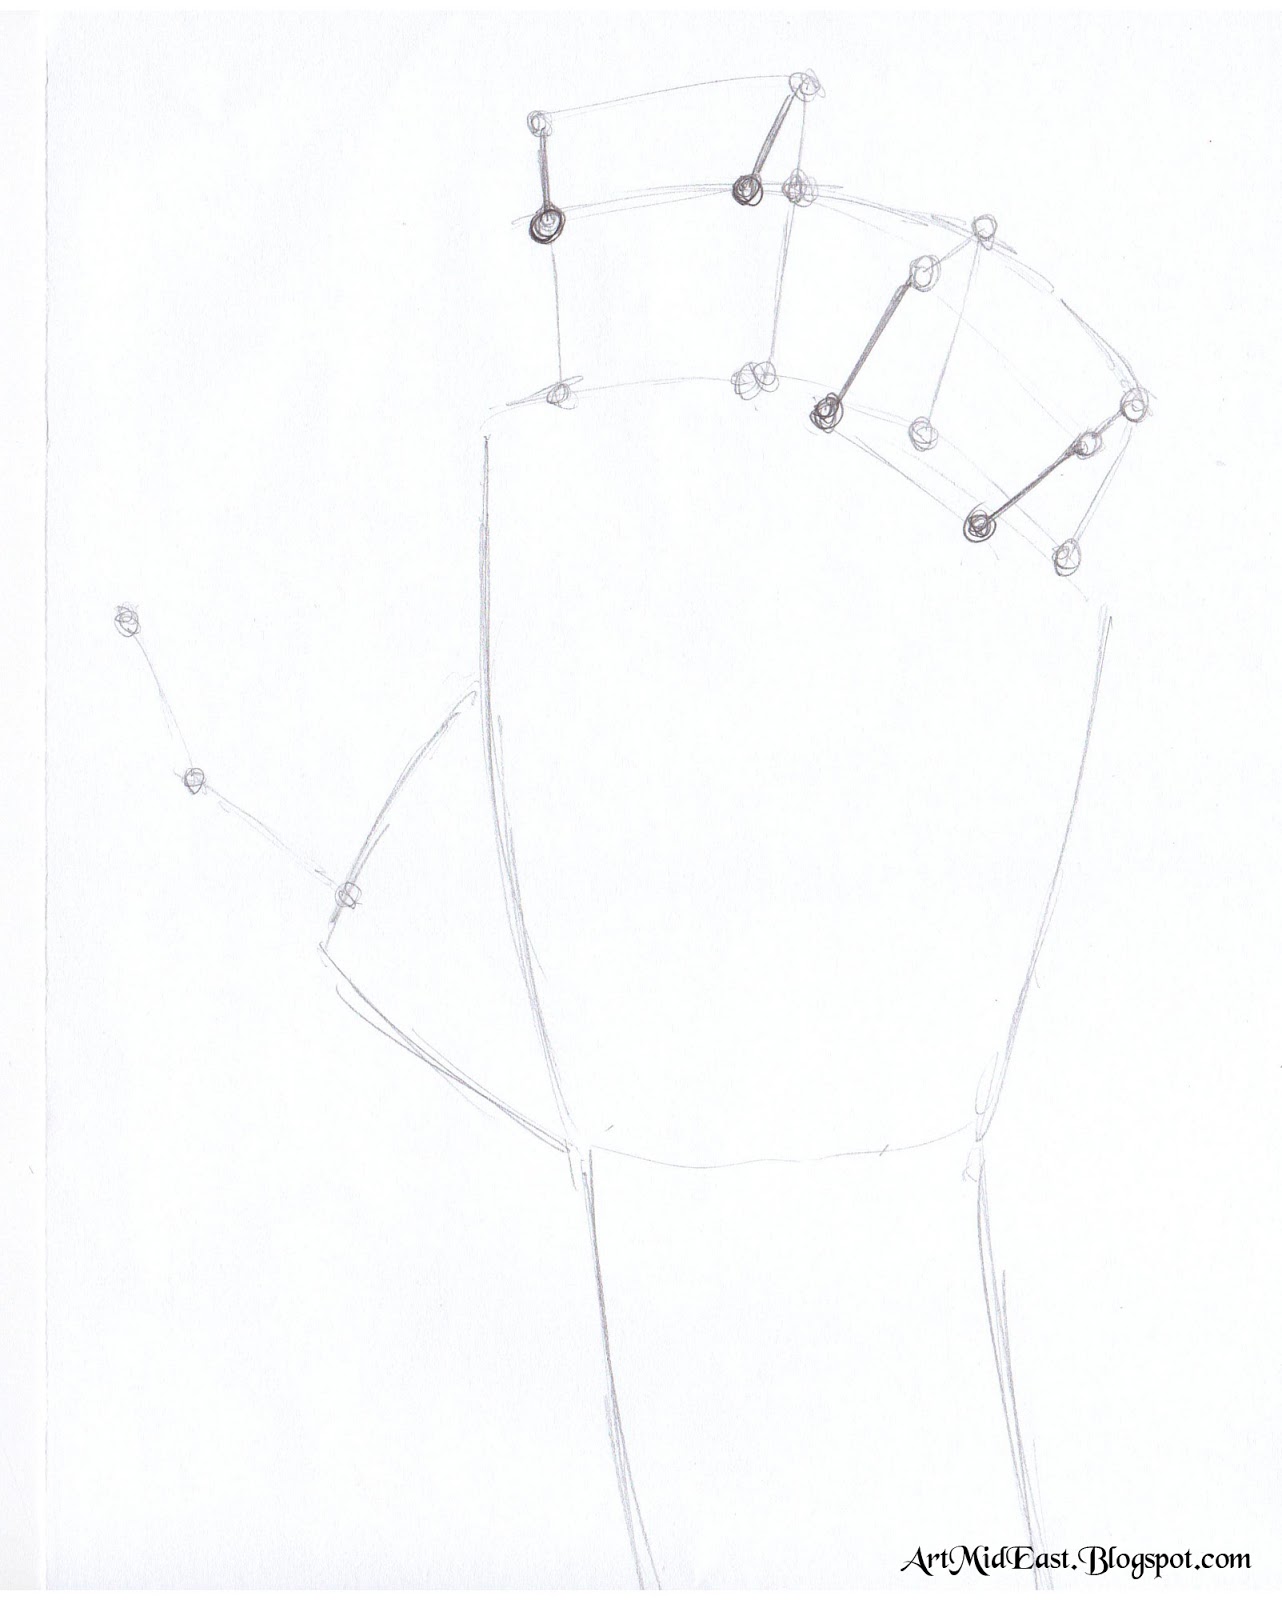
Hand #1 - Step by step
The first hand we are going to draw, will be from the opposite side of the 2 previous drawings, and with the fingers slightly bended (this angle is actually pretty similar to the one from my older How to draw a hand lesson.

Here you can see the wrist, and part A connecting to it. As I've said before, part A is a round trapezoid. I tried to be as simple as I can, and later on we will add more details to this and all of the other shapes.

Here I added part B. Not a whole lot to add, but notice the ~40 degrees angle we've talked about.

Here I added the first knuckle of each finger, including the thumb. Usually we will start by drawing where the fingers are going to END (so we can gauge their length), but for this example I prefer to do it that way. The most important thing here, is to make sure we get a fan if we were to connect the knuckles.

Here I added another knuckle to each finger. Since the ring and little fingers are very bended, this knuckle is lower then the first one. The index and the middle fingers are only slightly bended. This is a common thing that happens in hands, having the shorter fingers bend more the the longer ones.
Here we added the third knuckle. This time, the index finger's 3rd knuckle is actually blocking our view of the 2nd one. Look at your own hand and see it happening for yourself.
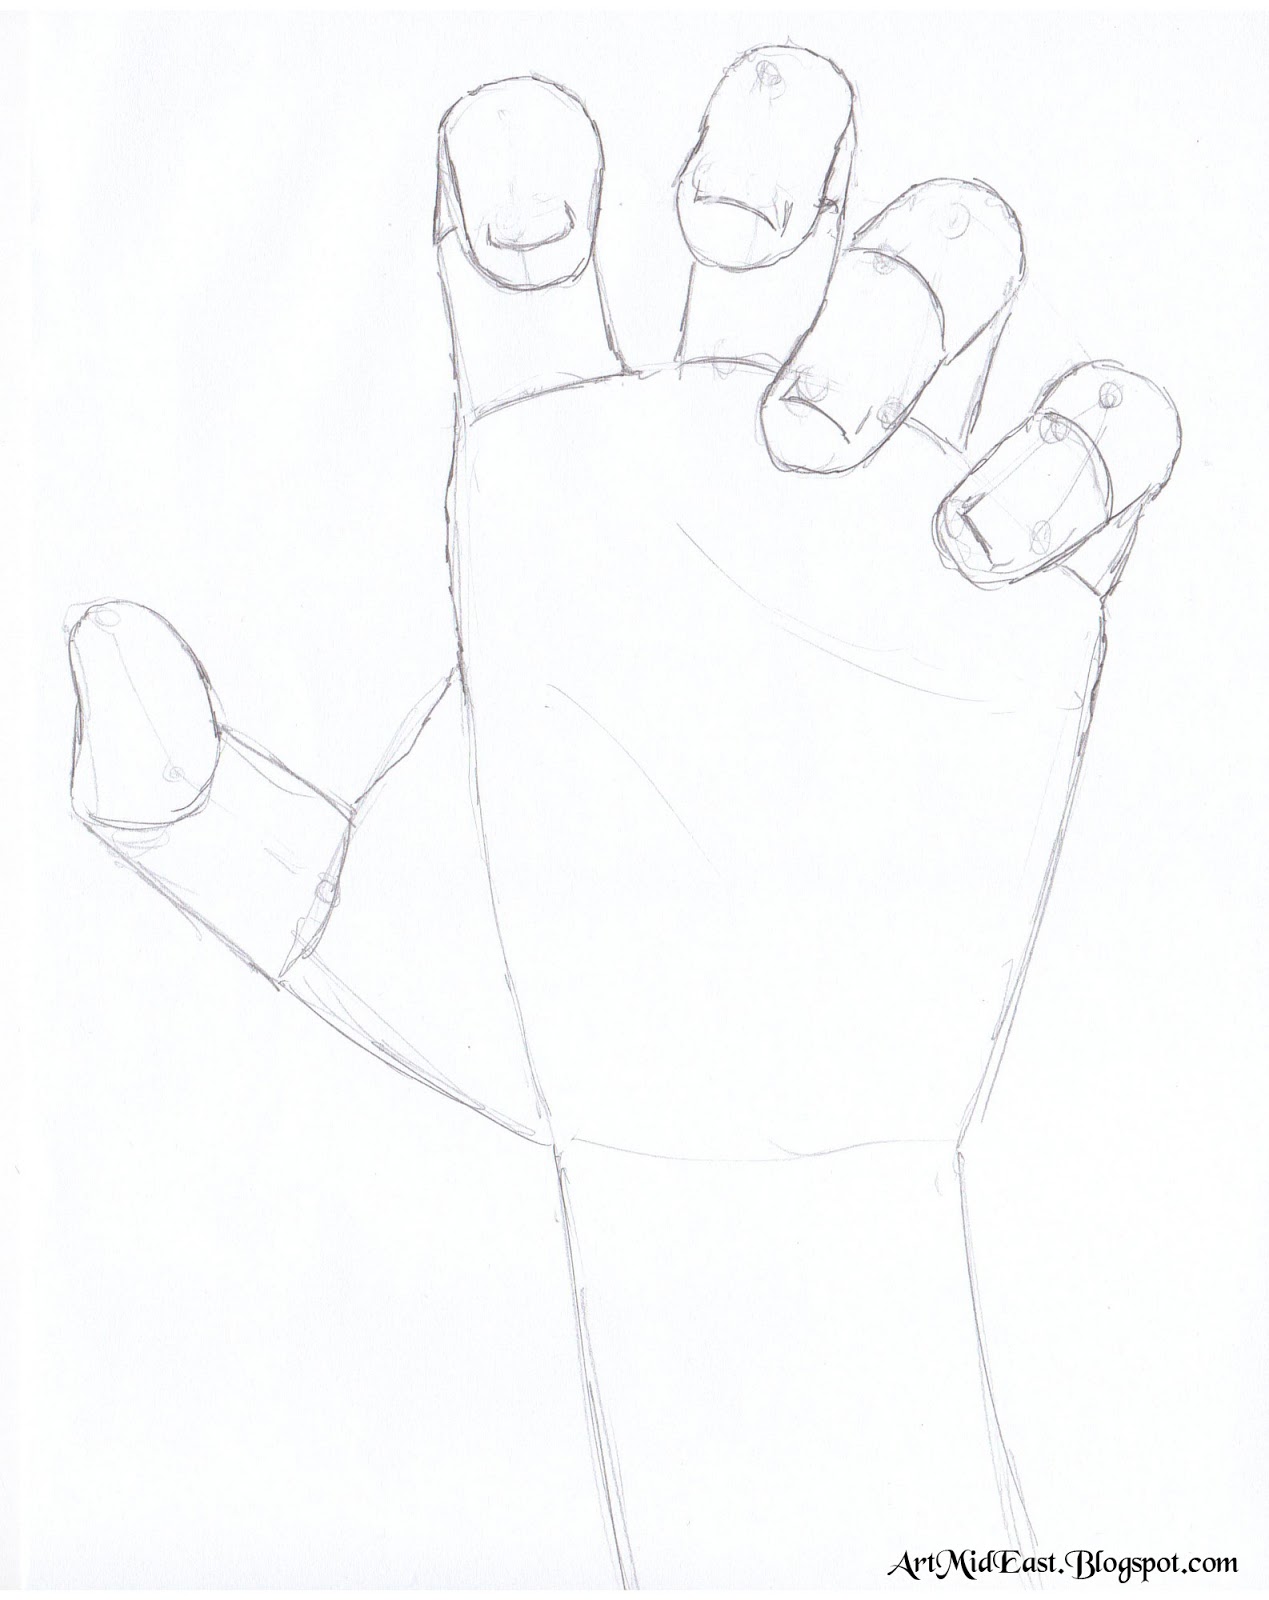
This is the cool part, where we actually make solid fingers, based on the lines we drew up till now. It is important to note again, that the fingers are thicker where the knuckles are (meaning where they bend), and their 3rd knuckle is slightly bended back. I find that this part is actually quite challenging. Another important thing is to take into consideration the foreshortening that occurs with the fingers that are pointing towards us. This affects how the nails look as well. This is also tricky, so take your time building it up, and erase and redraw if necessary.

Here I shaded the hand. Check out my lesson on Sketching and Shading Techniques for more on that. I will just point out that the light source is coming from the left, so the shadows are on the right. This really helps to indicate the nails.
And we are done with this hand
----
Check out my new website and subscribe for a FREE eBook! (=
LironYan.com
----
Hand #2 - Step by step
We are now going to draw a hand in a very natural and relaxed position. This is the way a hand typically looks like, when a person is standing in place.

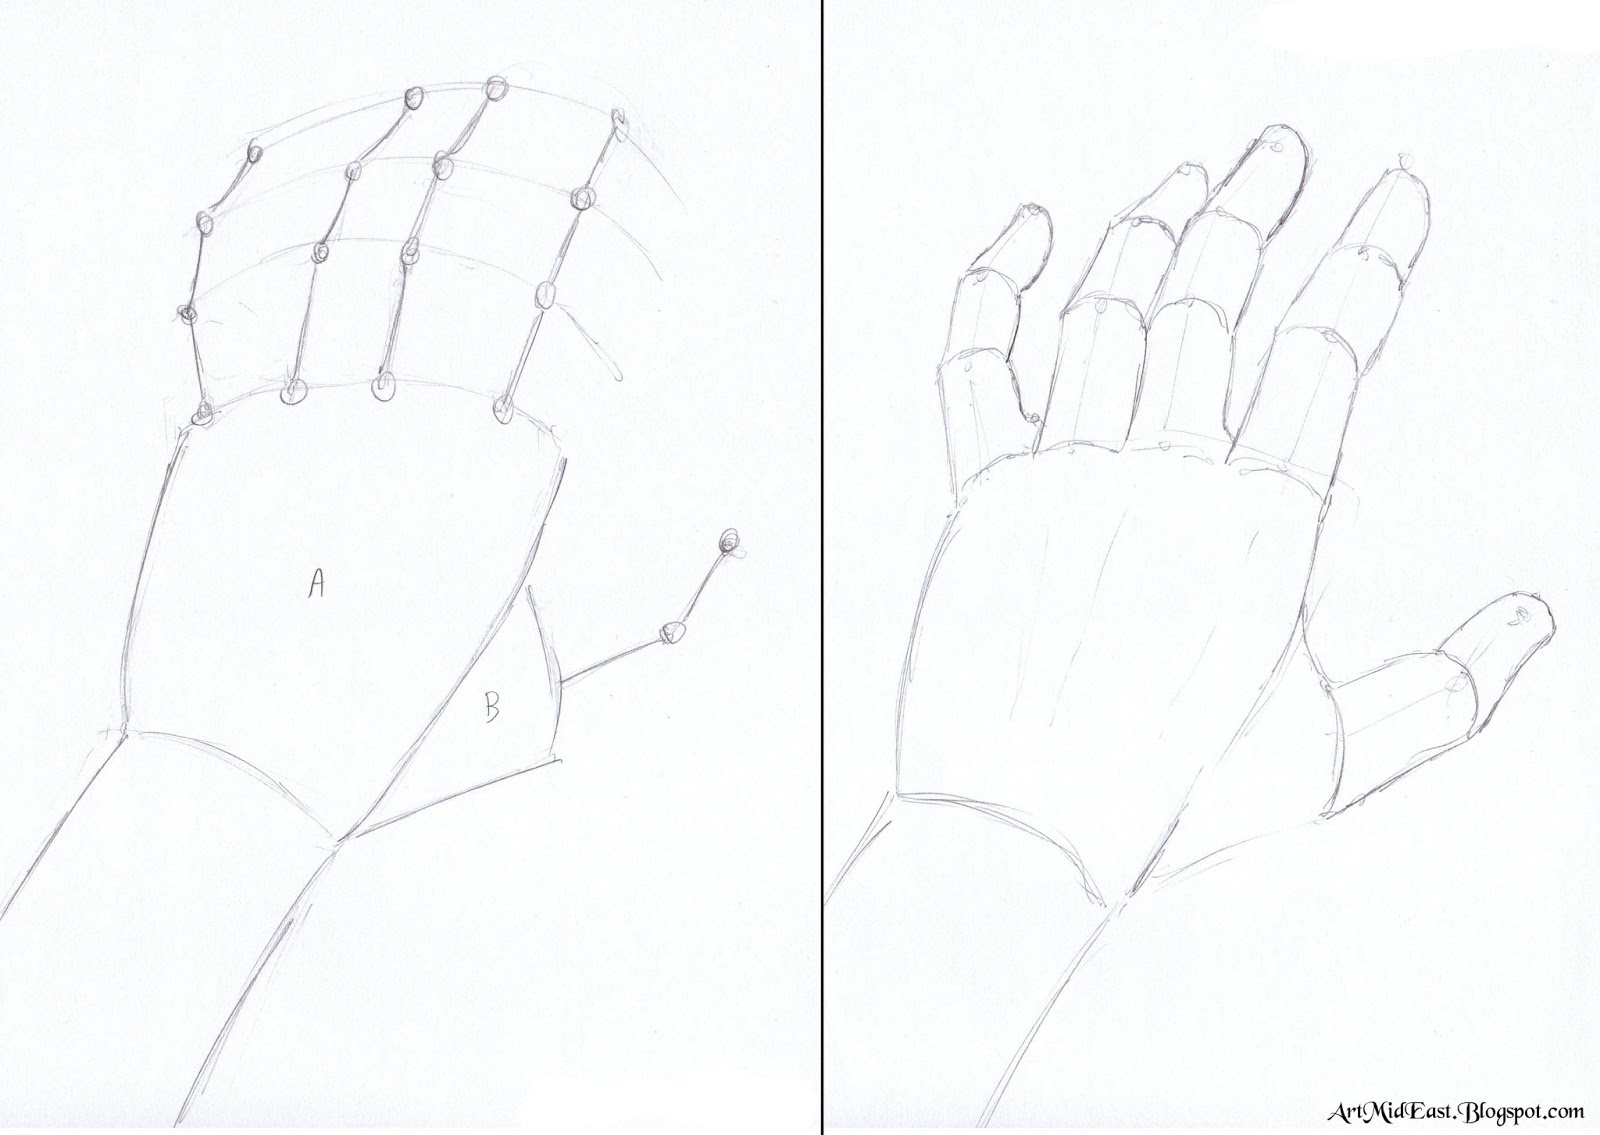
Here are our A and B parts. Since this is a more relaxed pose, part B is less prominent. Try and look at different hands, and see how this occurs in different angles. Later on, we may see angles in which the thumb, and also Part B, are not visible at all.

Here I added the knuckles, and indicated the fanning that occurs. You can kind of already imagine the fingers.

Here I solidified the fingers, and slightly indicated the thumb's nail. Notice how, again, the shorter fingers are bending MORE then the longer ones.
Two More Examples
Here is an example of turning the sketch into solid objects (mainly the fingers). Its important to remember that these are all cylindrical objects, that have mass, and as such you have to draw them properly.
Here is a colorful example, that will help you understand the sketch better.

--------------------------------
That's it for the examples. I hope this drawing lesson gave you some simple tools that will help you learn how to draw human hands. There are a lot of things to learn, and there are literally infinite angles and poses. This is great, since you are being challenged constantly.
On my next post, I will draw a few more interesting angles of hands, including ones holding objects, just to get your creative juices flowing.
And after that, we are going to mix it up and draw something completely different and surprising.... [=
Check out my new website and subscribe for a FREE eBook! (=
LironYan.com
Good things to come,
Peace,
- Liron
Read More


