On today's drawing lesson you will learn how to draw this fish, and fish in general!

This is the third lesson on my "Super Simple Series"! You can find more information and lessons from this series here: Super Simple Series (link will open in new window).
This lesson will be divided differently:
1. A detailed how to draw fish lesson.
2. An "infographic", summerizing the entire lesson.
1. How to Draw a Fish - Step by Step
Here is the whole process it took to draw this fish, and some more important tips on how to draw fish in general.
fish!
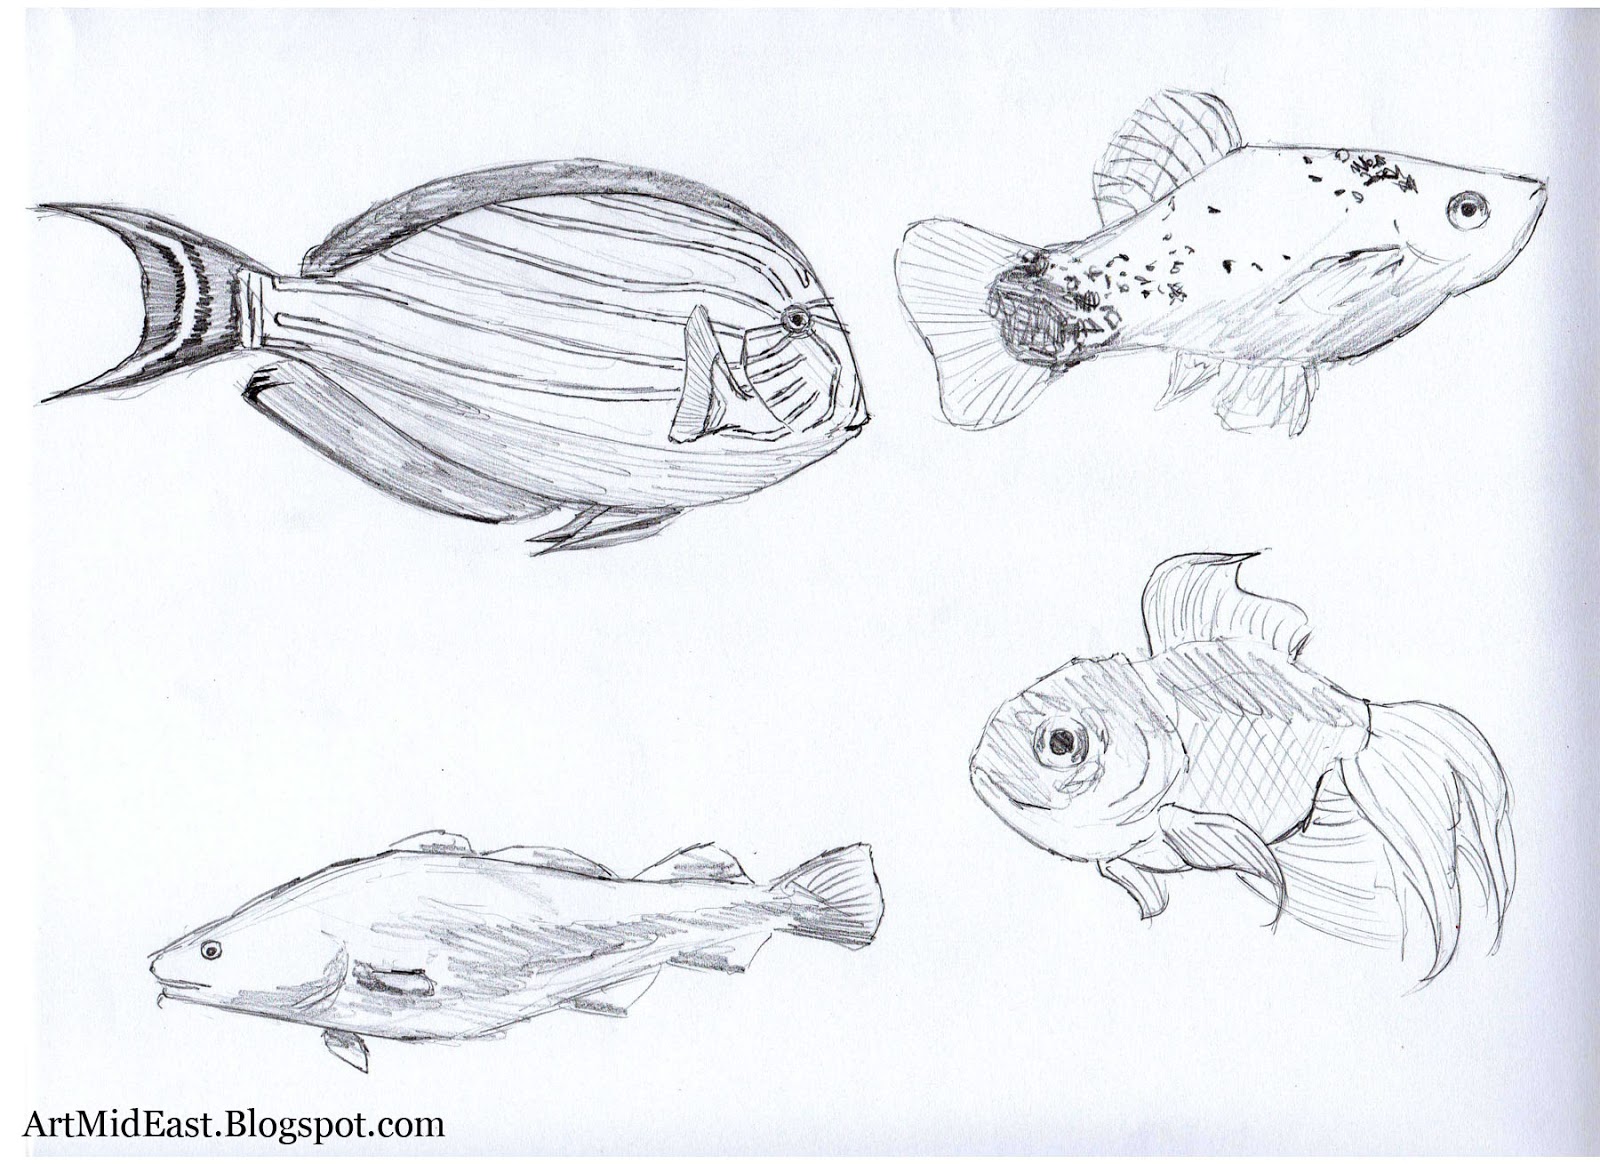
Here are a few drawings I've made, some of which are based on pictures I found on google.
After doing many of these, here are some general insights that helped me:
A. Most fish's bodies are actually built in a similar way. There are a few variations of body and fin shapes and sizes, but most of it is very similar. Consider these examples:

The fish look quite different from one another, but they all have fins on their top, size, tail, and bottom. Also, their bodies are shaped almost exactly the same. The only thing making a difference is their fins (which broaden / shorten the body's shape and size).
B. The gills are located right between the face and the side fins.
C. The scales are visible mainly on the bottom part of the body. Light that comes from the top (from the water's surface) creates a shinyness that hides the scales.
D. On the fins, there are sort of small "arms" that split into 2 parts (This is seen in the infographic too.

I saw this happen in many other fish. Do a little search [=
Now lets move on to the drawing process.
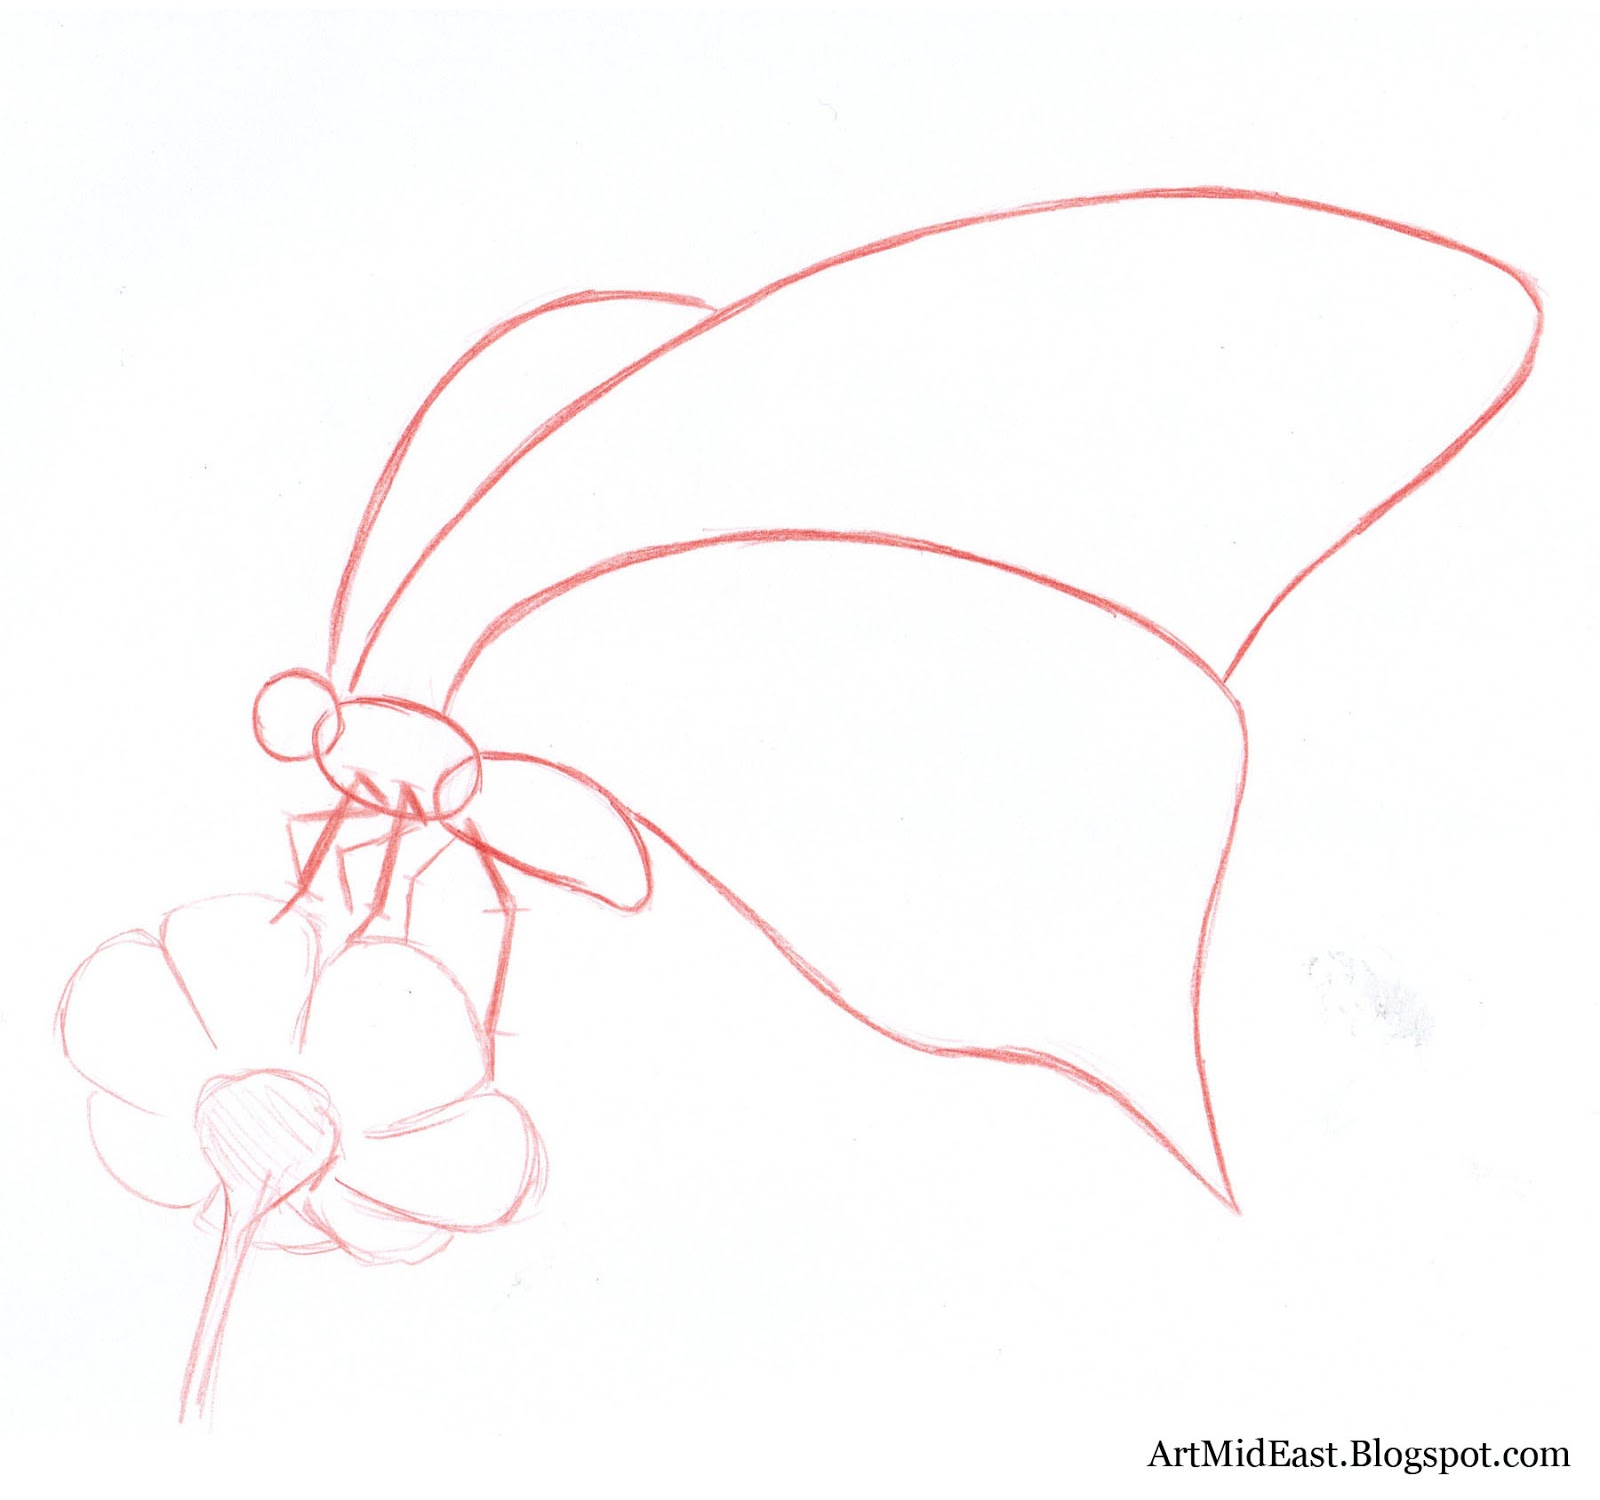
Step 1 - The body's front:

Draw two Perpendicular lines. The upper line is twice the length of the bottom line. Also make a small vertical line where I drew one. This will be used later to draw the mouth.
Step 2 - The body's center and back:

Draw the rest of the body using semi-straight lines. What I basically did was:
- Connecting another straight line to both lines from the previous step.
- Connecting a more curved line from these two lines, that leads to the back part of the body.
Step 3 - The fins:

Draw the fins, using very basic triangles and squares. The only fin which is not triangular is the bottom back one, which is basically a curved rectangle. Make sure that you draw to connection of the back tail fin the way I did, to the small square from the previous step.
----
Check out my new website and subscribe for a FREE eBook! (=
LironYan.com
----
Step 4 - The face:

Draw the mouth using the guide line we drew earier. Notice that the lower "lip" protrudes more then the upper one. Also draw the eye, which is simply a black circle inside a white circle. Also draw the gills. As I said before, they are located between the side fin and the face (I didn't know that prior to making this lesson [= ).
Here is a zoom in on the face, isn't he beautiful?

Step 5 - Details of the fins:

Draw the small "arms" I talked about earlier. Notice again how the top fin's arms are splitting into 2 smaller "arms". Geez, there must be a scientific term for this, if anyone here happens to be a fish expert, please share it with the rest of us (=
Step 6 - Rounding the body and fins:

This step is barely visible here, but it is very important. Remember how we drew the body and fins based on straight lines and shapes? Now it's time to round the corners and curve the lines a little, as praparation for the inking. You can see what I did mainly on the connection of the tail, and the tail's fin.
Step 7 - Inking / Darkening

Ink / Darken the correct lines. Make sure you ink and darken the round lines we drew, and not the earlier, straighter lines.
Step 8 - Scales, texture and shading
Draw the scales. I used very simple cross hatching and quick lines, although you can take your time and draw more details. I also drew a darker area, beginning at the gills and ending at the tail. This kind of thing happens mostly on smaller fish. These fish tend to have a more transparent skin and body, so you can see their inside a little. Again, if any fish expert here has any idea what this dark area is, let us know [=
If you want to learn more on texture, shading and cross hatching, check out these drawing lessons as well: Sketching and Shading Techniques and How to Sketch - Sketching techniques (Elaborated).
Now all that's left to do is to erase the red pencil lines...
and here is your fish!

2. How to Draw a Fish - Step by Step - Summary

====================
With this I'll end today's lesson on how to draw a fish.
Follow me on Facebook, Twitter and Pinterest (With the buttons on the top of the right side bar) to see more pictures of me preparing this lesson, and share this lesson with your friends!
Next lesson will be on a badass animal (actually one that eats fish), can you guess which one.....?
Also, check out my new website and subscribe for a FREE eBook! (=
LironYan.com
Until next time,
- Liron