In this drawing lesson, we will learn how to draw a boat!!!
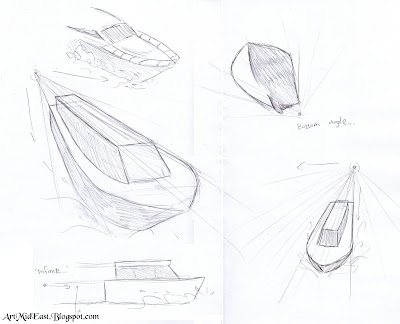
Every time I do a lesson like this, that requires some knowledge on how to draw something, I make a little study on what I'm drawing. This time I wanted to show you some of the work I made on studying how different boats look from different angles.
Lets get down to business!
Here is the basic shape of a boat:
This may seem funny and too simple, because most of us DO know how a boat looks, but this was very important for me, since I didn't know EXACTLY how a boat looks and "behaves" in space, especially from below, or from other different angles.
Here are some more different angles and perspectives in which I drew some more boats.
This was mainly for me, so I could choose an ideal angle to draw in. I also shaded some of these for my own fun.
Now its time to choose an angle / perspective, and start with a rough sketch. For more information on perspective, check out my previous lesson here: How to draw in perspective - one point.
Here I built the extremely simplified, rough sketch of the boat:
What I'm worried about now, is getting the lines in the correct places, especially the longer ones. Also, I make sure the lines are congruent with the perspective (you can try and find the vanishing point on the left, outside the canvas...).
Now its time to add in some details:
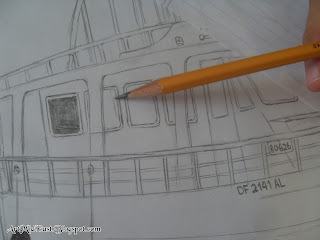
I added more to the structure itself, as well as a preparation for the windows and guard rails. All of these details are conforming to the perspective I set up.
Now its time for the real deal:
This took the major bulk of my drawing time, since I added so many details and objects to the boat. This is basically the final version BEFORE the shading process. I added, the ropes (including some ripples in the water), the windows, the small signs, the post, some small objects like the lights and horn, and cleaned some unnecessary lines.
----
Check out my new website and subscribe for a FREE eBook! (=
LironYan.com
----
About the windows:
Notice how on the previous step I drew long lines for the windows, and in this step I divided them into the windows and erased the lines. This is a really neat trick for getting many lines correctly, since the windows are at the exact same height.
Now its time for the shading! For a more detailed shading lesson, check out this drawing lesson: Sketching and Shading techniques.
Here are some examples of me shading the door and windows:
A useful tip - put a small piece of paper under your hand, so you won't smear your drawing. This is especially important if you do a pencil shaded drawing, because most of the lines aren't going to be erased!
like this:
I didn't put much thought into the water, and used my instincts to draw them. As you will see in a moment in the final version, I made sure to get some ripples around the ropes, and also the reflection / shadow of the boat's body.
And here is the final version!!
I think this one turned out really cool, and even though I made some minor mistakes on the first steps (with the basic sketch and perspective), it still turned out nice and even a bit realistic.
This is it for today's drawing lesson. Hope this gave you some inspiration to go out and draw your own boats. I suggest going out and actually taking pictures of real boats, and then using them as your reference, which is actually what I've done here!
Next lesson will be very fun, and will discuss a highly requested topic, so keep your eyes open and stay tuned... (;
Also, check out my new website and subscribe for a FREE eBook! (=
LironYan.com
Peace,
- Liron.


Very helpful, thank you.
ReplyDeleteThank you so much! Feel free to ask me anything if you want further advice or help!
DeleteThis comment has been removed by the author.
ReplyDeleteNice drawing!
ReplyDelete