On today's drawing lesson you will learn sketching and shading techniques. I wanted to make a refreshing change from my last two lessons, which include coloring, and to show you how you can make a finalized drawing using pencil only! [=
---------------
* Update: I published a more elaborated lesson on sketching techniques I recommend you to check out at: How to sketch - Sketching techniques (Link will open in new window).
---------------
In this lesson, you will be guided with the help of a drawing I made just for that purpose. Here is a sketch of the drawing, it's a guy walking with two dogs, and taking a pic with his phone.
So basically I made a rough sketch of the scene.
On holding the pencil:
When I drew this, and on the following phases, I alternate mostly between two ways of holding the pencil:
1. Holding on the very back of the pencil - this helps me in drawing long, curved lines. The reason for this is that holding the pencil that way uses the natural pivot of the palm, and helps in getting the curves quickly and accurately. It does take some practice though. Here is an example to make it simple to understand:
2. The second way is holding the pencil very close to the lead - this gives more control and accuracy, and helps in places with many small lines, such as the fur of the dogs (and especially that tail of the Husky...).
A word on the speed of drawing:
Bottom line - sometimes you have to draw fast! I don't mean you have to rush through the drawing. I do mean that you have to throw the lines quickly. This is true especially for those long curved lines I was talking about. This can be quite challenging sometimes, but you get used to it. In this example specifically, it is less needed, but when inking it is sometimes extremely important to use quick lines, since otherwise the pen shakes and won't give you the wanted result.
Lets now move on with the drawing - here I darken the lines.
Since my drawing is going to be pencil only, my pencil is my "ink and pen". For that reason, I go over the lines again to make them "pop" the way I want, and to give it a more finalized look. I try to make it as non sketchy as I can. Pay attention to the folds here, I will probably make a different post on this subject, but there are many great resources online.
This is what I got:
----
Check out my new website and subscribe for a FREE eBook! (=
LironYan.com
----
Darkening and Shading
After we've got our finished and refined sketch, it is time to darken what's necessary, and to give it some shading.
What should you darken?
As a general rule, you can darken whatever you want! [=
Some colors however ARE darker when turning images into black and white. A good example for this is the color brown. The best thing to do is to make your own research. here is a short check I made using photoshop:
As you can see, the brown-ish colors are pretty dark, while the blue and yellow-ish aren't.
In my drawing, I chose to blacken the dude's hair, and to only darken the pants (they were actually black, but for the sake of teaching you shading, I will simply make them dark).
Pay attention to how I darken the fur of the dogs. I use short lines that mimic the furs shape, and that creates a more dynamic and realistic result.
Another important thing that helps in making the final drawing cooler, is the direction of the lines which are used to darken areas. I darken in the natural direction of the body being darkened. Like this example of me darkening hair, look how the lines go with the "flow" of the hair. This gives the drawing a nice 3dness:
I learned this from Mark Crilley who is an amazing artist, whose videos you have to check out.
Shading
This is a huge topic, I will try to make it as clear and simple as possible.
There are a couple of main things that influence how shadows are going to look:
A. The power and distance of the light source.
B. The direction of the light source.
C. The distance of the body from its shadow (more correctly, the distance of the body from the surface on which it's shadow is going to appear)
To make it simple - here are some examples I made:
As you can see, the parameters at the top influence the darkness of the shadow, its size, its fuzziness and obviously its location.
In my drawing, the shadow is coming from the top, since its outside, at daytime, and the sun is the most prominent light source. It's late afternoon so the shadows on the floor are week (and also, my scanner + pencil causes them to become even weaker).
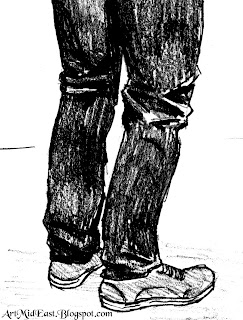
Also, I want to emphasize the shadows on the pants, where the knees and shoes are:
Here is the final drawing, after taking into account all of what we talked about!
I hope this drawing lesson was more "zoomed in", and gave you some practical knowledge you can use in order to improve your sketching and shading techniques. I plan to make a more step by step lesson real soon, that will be less theoretical (=
So keep your eyes open for updates!
Also, check out my new website and subscribe for a FREE eBook! (=
LironYan.com
Until next time,
- Liron


